

In the last months, I have been writing about the painting principles, techniques and strategies that lead me to the decisions I make on my painting and when I am teaching my students. While I was going through my notes, looking for a theme for my first blog post I found something that is the beauty of working with oils.
It's a technique that I have applied to my work in the last few years more intensively. It's called "Lost and Found Edges".
What is Edge?
In painting, an edge is where one shape or one brush stroke meets another. Every stroke creates an edge. It's not limited to separate objects, but also variances in color and shading.
I have found that one of the most common mistakes that many students make is creating a sharp boundary between every object in the entire scene which makes them look like cutouts.
Some students are afraid of softening edges and "losing" the shapes. It is okay for beginners as it's much safer and comfortable to have shapes to color in. I've been there before and I know how hard it's to move away from this habit. But the more experienced we become as artists the more we need to let go of the idea to enclose everything with a neat edge.
Types of Edges:
"Lost Edges"
Also referred as Soft Edges they are smooth, quiet transitions.
You create "Lost Edge" when:
You soften off or completely lose an edge. They disappear into the next shape and you can hardly see where one shape meets the other. They blend into each other.
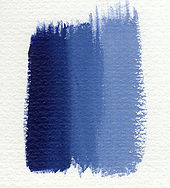
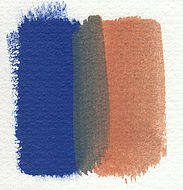
Between two color shapes you can paint a color that has a medium value (fig.1) , forming a "bridge" to graduate a darker color shape into a lighter one. Or if the color shapes create a high contrast you can mix them together creating a new color to paint between them (fig.2).
That makes the edges of these shapes shift gradually into each other, reducing the contrast created between them forming a soft or lost edge.
"Found" Edge
They are also called sharp or hard edges. They are dynamic delimitations between areas. They command attention and give strength to a focal point.
You create Found/Hard Edges when you paint:
Two colors side-by-side without blending them (fig.3).
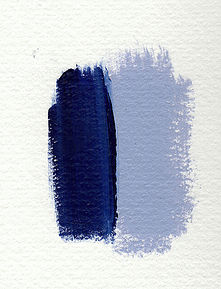
Fig. 3 - Hard (sharp) edge
A thin layer of Color first and a thick stroke of paint on top of it (fig.4).

Fig. 4
Two Colors that create a high contrast side-by-side. (Eg. Black x White. Complementary colors - Blue x Orange) (fig.5)

Fig. 5
Below (fig.6) is one of my paintings in which I explored the "Lost and Found Edges". It's called 'Mustering - Mount Cook Station'.

Fig. 6 - Mustering - Mount Cook Station by Livia Dias
I softened off the edges on the background making them disappear towards the end of the track (fig. 7) to create an atmospheric effect and a sense of mystery. The "Lost Edges" also made the elements in the background recede into the distance.
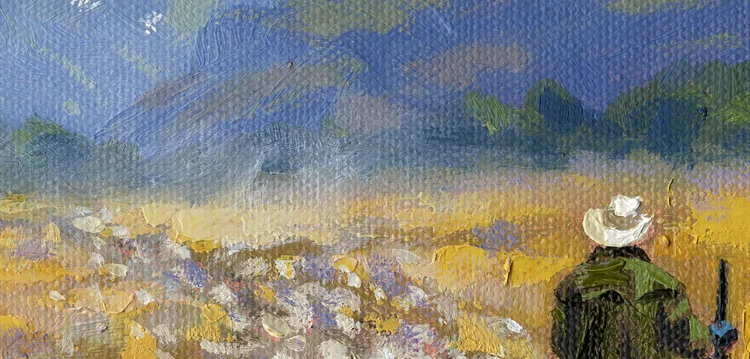
Fig. 7 - Detail
Then I painted the musterer on his horse with sharper edges (fig. 8) to make it be my focal point and advance into the foreground.
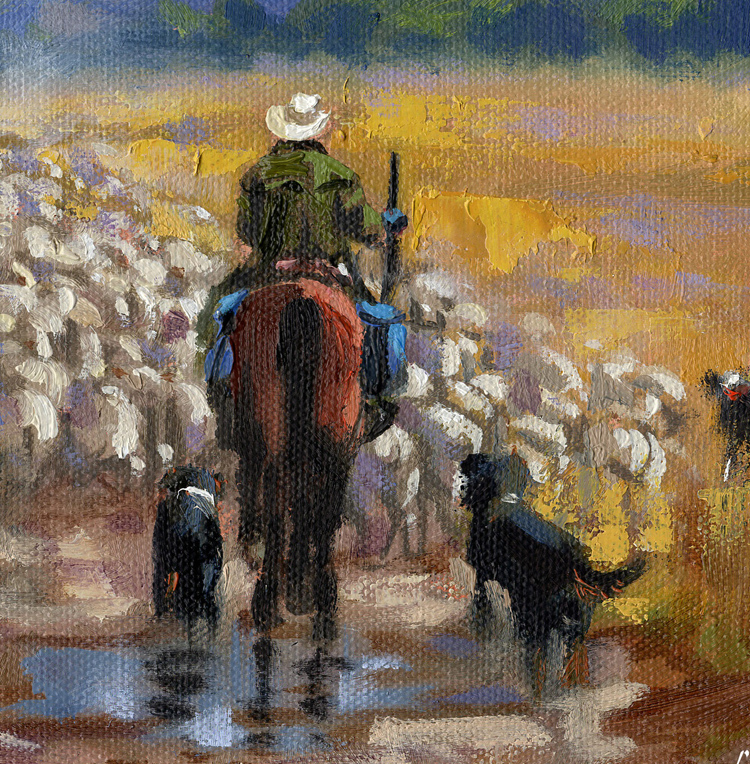
Fig. 8 - Detail
Have a look at the edges of this dog below (fig. 9). Most of them are lost. This gives a sense of movement as well. It actually looks quite weird when seen in isolation, but when all the elements are put together it makes a lot more sense!

Fig. 9 - Detail
What edges do in a painting:
They suggest the quality of the atmosphere- use softer edges when objects recede into the distance or sharper edges when the objects advance in the foreground.
They draw the viewer's eye to the focal point. The human eye cannot look at an entire scene at once. What we look at directly is in focus. Everything else around it is out of focus. Use edges in your painting the same way. Sharper edges where your center of interest is and softer on the secondary areas.
They suggest the shapes of objects. The side of a building will be usually harder-edged than the rounded form of a tree or a cloud.
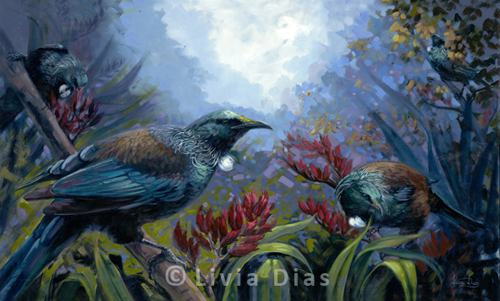
Fig. 9 - The Tuis' Encounter by Livia Dias
This is another of my paintings where I explored the effects of "Lost and Found Edges". I used softer edges towards the background and sharper edges on the elements near the center of interest, the foreground Tui Birds and the flax flowers between them. This strategy makes them be the stars in this scene.

Fig. 10 - Detail

Fig. 11 - Detail
PRO TIPS
Step back often to evaluate what the edges in your painting are doing in the composition and overall look.
Be aware that too many obvious edges make a work busy.
Too many soft edges make a painting weak.
Orchestrate the edges in your painting in order to achieve the balance that you aim for your painting. For instance, sharper edges can give strength to your focal point and softer edges can keep secondary areas quiet.
Use "Lost and Found Edges" to add an air of mystery, nostalgia and romance to your painting.
Knowing how to manipulate edges well is a powerful tool for an artist. Don't worry about "losing the edges" strategically. Your painting will still make sense without all the edges carefully shown. The viewers will understand the shape once they see the " found" edges of the object.
I hope that this post has been useful for you. Please leave your comments below, I would love to hear from you! Let me know what are the topics you would like to learn more about.
If you’d like to know what online courses I have available for you, click here.
